New Work & Old Favorites

This Christmas, I gave myself a gift. The first part was to really, truly take four full days away from work. No email, no phone calls, barely a thought of the office. Sure two of those days were a weekend, but if I’m being honest, it’s rare that I even go a whole weekend without doing a little something for the magazine, so this really felt indulgent for me.

The second part of that gift was to spend much of that time printing. I had a few things I had to get done for Driftless Studio—a beautiful store on State Street in Madison owned by a talented photographer, writer and wonderful person named Anne. Her favorite design is my “Gone to Seed” dandelion print, so I printed up a bunch of those in light blue, plus some Happy Birthday bike cards, some blue and green grasses, love you. cards for Valentine’s and more.

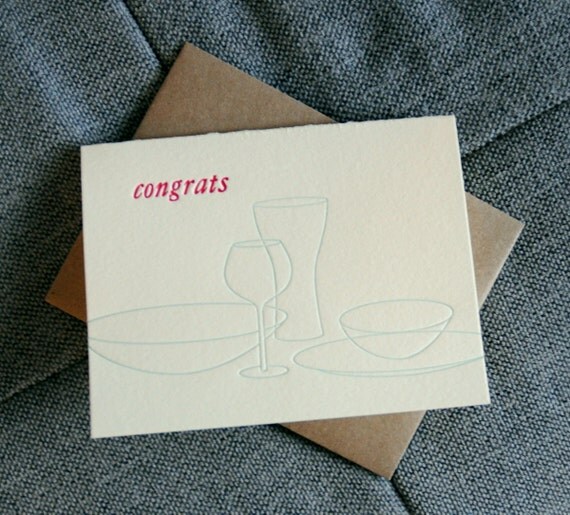
Since the process of inking up, setting the plate and cleaning up is so labor intensive, I tend to print several different designs while I have a color on press. So while I was at blue and yellow, I also did a reprint of one of my fastest-selling designs that I’ve been out of for a while, “you are my sunshine.” I also did a run of a new “congrats” card that would work perfectly for a wedding or new home, plus started lots of recipe cards, limited edition prints and more.

Christmas 101: Wrap it up!

Merry Christmas Eve eve! My shopping is done—more importantly my crazy work week is done—and I’m finally getting into the holiday spirit. This year instead of spending even more money on gift wrap, bags and bows, I thought I’d use what I already have on hand to make my gifts extra special.

I love kraft paper. I’ve used it for envelopes, limited edition prints, and this year I decided to use it to wrap several of my gifts. I grabbed a couple grocery bags from my recycling pile and voila! The perfect blank canvas for all your creative endeavors. You’ll notice my palette isn’t exactly traditional: I love to work in blues and other jewel tones to make a modern holiday scheme.

On any patterned wrap, my letterpress circle garland would get lost, but against a simple grocery  bag background, it really pops. So easy to do, yet it’s really all you need! Then I tried a great ribbon plaid wrap I’d seen online. It looks complicated, but it’s really just a matter of weaving your ribbons over and under each other and taping them to the back of the box. If you’re more of a bow person, find a great tutorial here to make your own with all those scraps of fabric you might have lying around.

Next: the perfect solution for those oddly shaped gifts. I gathered a silk scarf around the top of this wine bottle—creating a gift that’s twofold, since the receiver can wear the scarf!

That big white box is the standard gift box you get when making purchases from any department store. I decided to glam it up with black satin ribbon on each corner, and accented the top one with some plastic rhinestones I’ve had in my craft bin for years.

Here’s wishing you and yours a fantastic holiday season. I didn’t quite make my blogging goal this month, but I hope you’ve enjoyed what I have been able to post for you! I’m heading out this afternoon to spend time with family, relax and do a lot of printing, so I’ll see you in 2012!

Christmas 101: A twist on a classic

Well kids, we’re getting down to the wire. Relatives are bound to start showing up any minute now, and—oh what’s that? You’re still not ready? Here are a few last minute ideas to get your home in the holiday spirit! The best part? You already have a materials and can pull them off in 10 minutes or less. Enjoy!

This first one is pretty darn brilliant, even if it does come from Rachel Ray Magazine. Take any piece of clear stemware—wine or martini glass, even a champagne flute—and invert it over some festive foliage: Holly branches, a poinsettia, even a bough from your Christmas tree, whatever you’ve got around. Place a small votive on the base (which is now the top) or each one and voila! A perfectly modern centerpiece.

You’ve got an extra strand of lights or two, right? Why not bring them inside, wrap them around… anything really (seriously: A spray-painted hula hoop, an old frame, a large embroidery hoop… the list goes on) and you’ve got a fancy festive chandelier that easily comes down when your guests go home—or you could definitely leave it up year round!

Pinteresting

I have a love/hate relationship with Pinterest. On one hand, browsing through it can generate all kinds of creative ideas and break you out of a rut. On the other, it can also create a Facebook-esque time warp and suddenly hours have been wasted clicking through information you don’t really care about. Either way, I thought I’d round up a few of my favorite ideas here!

Beautiful decor ideas (is there any better way to make sure your guests don't see your messy bedroom?)
Crafty ideas and DIY tutorials (these are old t-shirts!)
Event Inspiration
Can be a great way to keep track of products you want
A little snark to make me smile (I'm thinking of hanging this in my office)

Are you on Pinterest? What do you think? Leave your screen name here to be followed! Follow me at pinterest.com/622press.

Gift guide: DIY

Let’s be honest, if you’re reading this blog you’re probably pretty darn crafty and you’re thinking about making some of your gifts yourself. Here are a few great ideas and tutorials to get you started!

First up: for your dad, uncle, brother or husband, a tie is always a great choice. But why not put a little extra love into this standard gift by making it yourself? Easy instructions are available at the Purl bee blog.

I’ve been spending some time at Higher Fire, a local ceramics studio, throwing mugs and bowls of all sizes. Most towns have a studio that offers this type of thing—or classes if you’re just starting out. If you’re not feeling ambitious or clay isn’t your thing, check out your local paint your own pottery place.

A few years ago, my sisters bought me a necklace pretty similar to the one above. Now, the Bayside Bride blog offers easy instructions for how to make it!